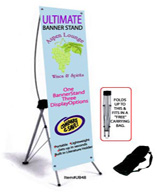
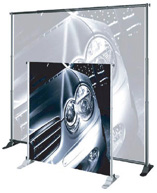
Banner StandsPrinted Banner and Stand Combination Sets

Banner Stand Choices

Over-the-street banner requirements.

Before ordering a street banner check with your city for specifications.
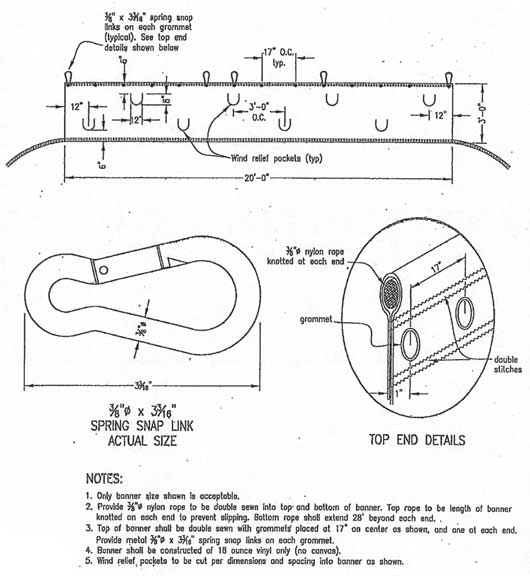
banner specifications orange 3Unlike standard digital print vinyl banners, over-the-street banners, have to adhere to a different set of specific rules to be able to be hung safely in common public areas. Since most over-the-street banners are extremely large in length, most cities have put into effect, specific rules and regulations street banners must follow to deem then safe for public display.

(The picture to the left is an example of the City of Orange's over-the-street banner specs.)


Below is a list of the most common city requirements for over-the-street banners. Every city differs with some cities being for strict that others. It is highly recommended to find out the specific codes and regulations that your particular city requires before purchasing any street banner.

VINYL MATERIAL WEIGHT: Standard banners typically are printed onto vinyl banner material that has a 10 oz. or 13 oz. weight. That is fine for regular installations. Over-the-street banners though typically require a heavier weight material, like 16 oz. or 18 oz., because they will be installed in a higher stress location that endures stronger winds and excessive exposure to the elements.

REINFORCED CORNERS: Most all banners have grommets (brass eyelets in the material for hanging banners) on the top and bottom of the banner. But street banners, because of how and where they are hung, can experience more stress at the corner edges of the banner. Reinforcing the corners helps reduce the risk of the corner grommets ripping out due to overwhelming tension.

SEWN IN ROPE: Since street banners are strewn between two unattached objects your city may require that your street banner have rope sewn into the hems with excess rope extending from all four corners. The sewn in rope will help tie off the banner at all the edges and offer more stability.

SNAP HOOKS: Snap hooks are either threaded through the grommets on the banner or can be sewn into the hems of the banner with webbing. Snap hooks attach onto cable or wire systems that are in place to display street banners.

WIND SLITS: These semi-circular holes that are cut into the vinyl banner material help by allowing air to pass more easily through the banner reducing stress on the banner.


Have more questions about over-the-street banners or possible street banner requirements? Then give us a call at 866-267-4467 and we'll be happy to help!

Choosing a decal cut style made simple!

What kind of decal cut do you need?

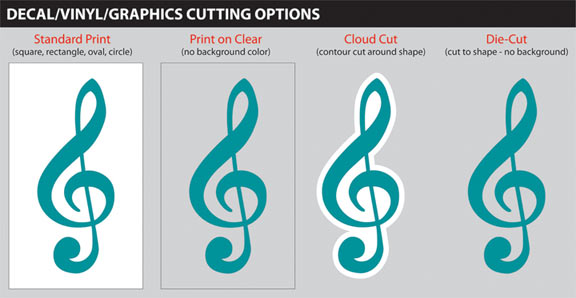
Decals have a few different cutting options to achieve desired looks and effects. The easiest and most simplistic form of a decal is a straight-forward print that is cut to a simple shape; with the most complex being a die-cut decal. Deciding which style of decal cut you need depends on how you will be using the decal and what type of look you are going for. Do you need decals that are cut-to-shape for vehicle graphics, wall graphics or window graphics? Are you in need of a simple square-shaped decal to pass out for promotional purposes or for bumper stickers? Do you need a cheap see-through decal for labeling? Or maybe a decal that has a custom cut around an image, creating a unique look, without the expense of a die-cut decal?

Whatever your decal cutting needs we've got you covered! Please see decal cut descriptions below the graphic for further explanation.

decal cuts

STANDARD PRINT: This cut our default and is the cheapest decal cut because of it's simplicity. Your decal image is printed on white vinyl (or paper) and is cut down to a variety of basics shapes like squares, rectangles, ovals or circles.

PRINT ON CLEAR: This cut mimics the Standard Print in every way except that your decal image is printed on a transparent clear vinyl. This gives the decal a see-through quality without paying for a custom die-cut to eliminate the background.

CLOUD CUT: This cut enables your decal to have a custom cut look without being totally cut-to-shape. Your decal is printed on white or clear vinyl and then a contour cut is applied to the shape of your image, leaving a thin border all the way around.

DIE-CUT: This custom cut literally cuts your decal out to the exact shape. This effect gives the decal a painted on look by having no background whatsoever. Die-cut decals require specific files for cutting and range in price depending on the complexity of the cut.


Have more questions about decals and decal cut options? Then give us a call at (714)  573-9313 and we'll be happy to help!

Banner Display, Installation & Storage

Tips to properly display, install and store your banner!

PLEASE REVIEW CAREFULLY: Proper banner installation and maintenance ensure that your banner is properly displayed lending to the longevity and functionality of your banner. When your banner is not in use, proper storage techniques, will keep the banner in good shape for use for many years to come. Improper installation and storage can lead to banner damage.

PROPER BANNER DISPLAYING OPTIONS:

  • SOLID SURFACE (buildings, walls, wood, aluminum, etc.): Each grommet point will need to be secured onto the surface with a screw and a washer. Failure to utilize all grommet points may result in a sagging banner and eventual damage to the sign.
  • CHAIN LINK FENCE: Each grommet point will need to be secured to the fence with plastic zip-ties or "S" hooks. These two products can be found at home improvement stores.
    • PLEASE NOTE: For chain-link fence installations you might want to consider purchasing a MESH BANNER that is printed onto a perforated banner material, that allows air to flow through the banner, causing less resistance than regular banner material that is solid and sail-like.
  • BETWEEN TWO POLES: Utilizing every grommet point, on the top and bottom of the banner, lace rope through the grommets and then tie the rope off at all four corners. (For Over-The-Street banners with requirements you might need sewn in rope with "D" hooks to attach to an existing cable system.)
  • POLE BANNERS: These banners are hung utilizing sewn-in "sleeves" or "pockets" using running along the top and bottom of the banner. The sleeves/pockets slide onto fixed or adjustable pole systems.
  • WIND BANNERS: Wind banners also have a "sleeve" which is threaded onto a pole set, akin to putting up a camping tent, for indoor or outdoor displays.

HOW TO CLEAN A VINYL PRINTED BANNER:

  • VINYL PRINTED BANNERS: If your banner starts to look a little dingy due to dirt build-up you can gently scrub the trouble sports with a soft cloth that has been dipped into a mild detergent. If storing the banner after cleaning make sure to wipe it dry and allow it to completely dry before storage.
  • FABRIC BANNERS: There are different types of fabric banners, all of which, have their own set of safe cleaning instructions. It's always best to call your sign company and ask for proper cleaning instructions for your particular fabric banner.

STORAGE OF BANNERS:

  • SAVE THE SHIPPING BOX: All shipped banners will arrive boxed. Keep the box for storing in between use.
  • DO NOT FOLD YOUR BANNER: Vinyl banners should never be folded because it will cause permanent creases to the material Always ROLL UP all vinyl banners for storage. As for fabric banners, in most cases, they can be folded without damage to the material.

ROLLING UP A LETTERED BANNER: Make sure to roll the banner with text facing outwards.
ROLLING UP A DIGITAL PRINT VINYL BANNER: Make sure to roll the banner with the printed side facing inwards.

If you have any further questions about proper banner display, installation,
storage or banner care, please contact us at: (866) 267-4467.

<- Back Online Help Center

Vinyl Application Kit

3-piece kit for easy vinyl installation and application.

vinyl-installation-kitApplying vinyl is fairly quick and easy for the average do-it-yourself project. But as in life, complications can arise during vinyl application, which can lead to a botched vinyl installation that ends up costing money to replace and redo. And keep in mind that even the most experienced vinyl installers have their share of failed vinyl application installations. (Please view our "How To Install Vinyl" video for a visual reference.)

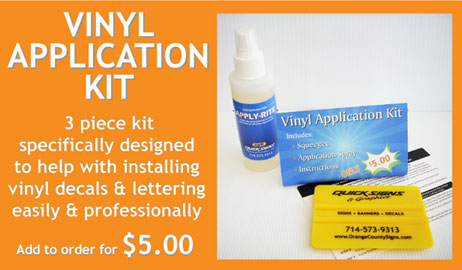
The vinyl application kit pictured on this page is intended to help with the vinyl installation process by providing you with 3 basic tools that will assist your vinyl application installation success.

This inexpensive vinyl application kit comes with a convenient spray-bottle of our Apply Rite application fluid, which helps prep the surface and vinyl, for a more flawless application with less bubbles; a standard plastic squeegee to secure the vinyl onto it's intended surface; and an informative postcard with detailed instructions on how to properly apply your vinyl decal or vinyl lettering purchase.

Add a vinyl application kit to your vinyl decal or vinyl lettering order and install like a pro!

(Vinyl Application Kits Not Sold Separately)

To inquire about vinyl decals and lettering, give us a call at (866) 267-4467.

<- Back Online Help Center

Got Questions?

Email or Call Quick Signs at (714) 573-9313 for Questions Involving any type of signage.

Send Email